So there’s this new website add-on called chatWING which allows websites to have ‘live chat’ experiences right on their website, for free. This would be great for sales-based websites since it’ll let you communicate instantly with whoever’s viewing your site, and helps you close the sale. I don’t use it myself but if you need to, here’s how you can create a chatbox with chatWING:
Note: The below tutorial is written by Aaron from chatWING, but I’m not being paid for this content. The original tutorial has been edited for conciseness.
Create an Account
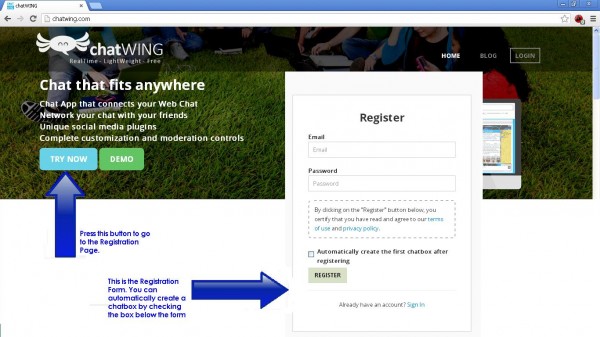
First go to Chatwing’s homepage and find the TRY NOW button. Click it to head to the Registration Page. Fill in your email and password then hit submit.
Creating the Chatbox
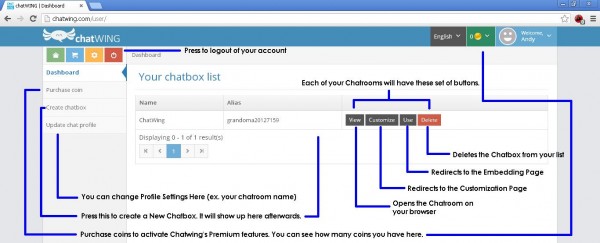
Right after creating your account, you’ll be redirected to the Dashboard. To create a new chatbox, just press the Create Chatbox button. It’s on the upper right part of the page.
Customizing The Chatbox
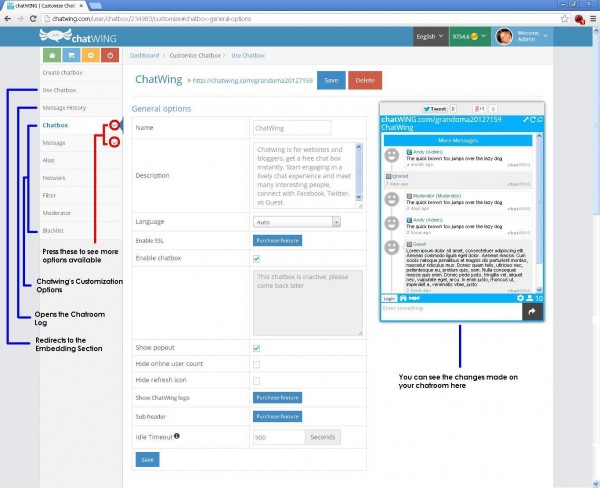
After creating the chatbox, you will be redirected to the Customization page. Chatwing’s customization options are grouped into Seven main tabs.
There are two kinds of customization options inside this page – the normal ones and the premium features. Premium features need to be purchased with chatWING coins first before it can be used.
The preview window will show your chatbox as as you continue to customise it. Remember to press the Save button to save your progress though.
Once you’re done customising it, press the Use Chatbox button to head to the final step.
Embedding the Chatbox
Chatwing has 3 methods of using the chatbox:
1. GroupChat URL
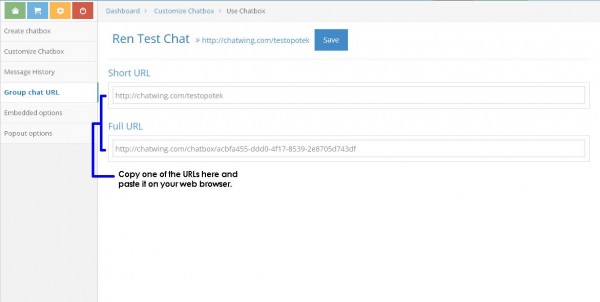
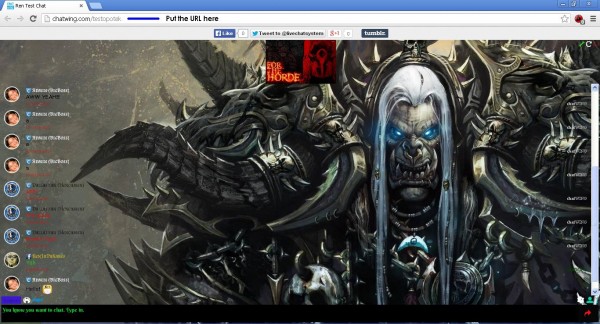
This is for those who want to use their chatboxes directly. You can see URLs of your chatbox here. All you need to do is copy one of the links and paste it on your web browser. The chatroom will show up moments after that.
2. Embedded Options
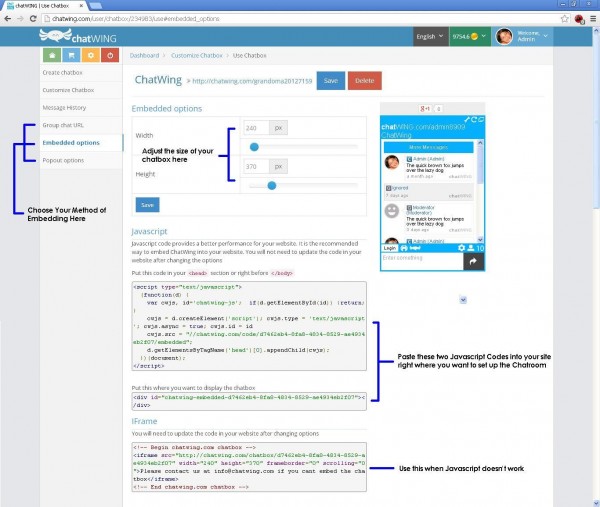
If you’re a site owner then this is for you. This method will embed the chatbox into your site as a supporting tool. Before you can embed it, you can still adjust the size using the height and width scrollbars provided. Once done, you’ll need to copy its HTML codes below and paste them into your site.
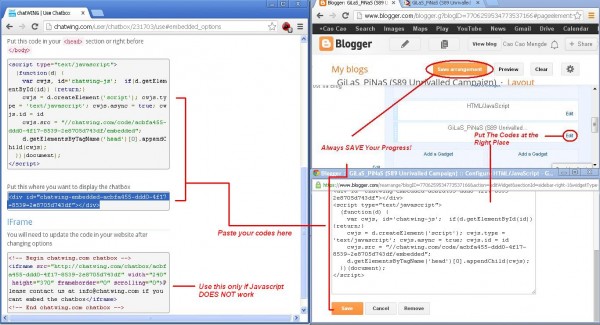
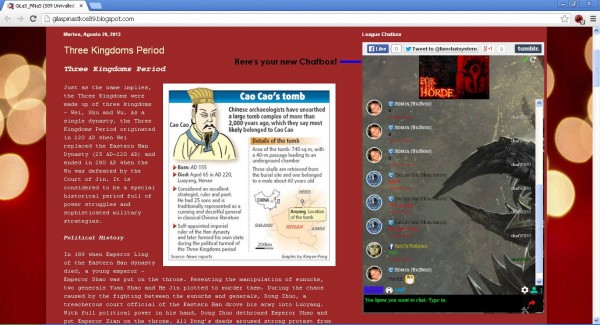
There are two types of codes here – Javascript (preferred) and iFrame. If Javascript doesn’t work on your site, then replace the codes with the iFrame ones. The chatbox will show up once you’ve saved your changes on your site and opened it again.
3. Popout Options
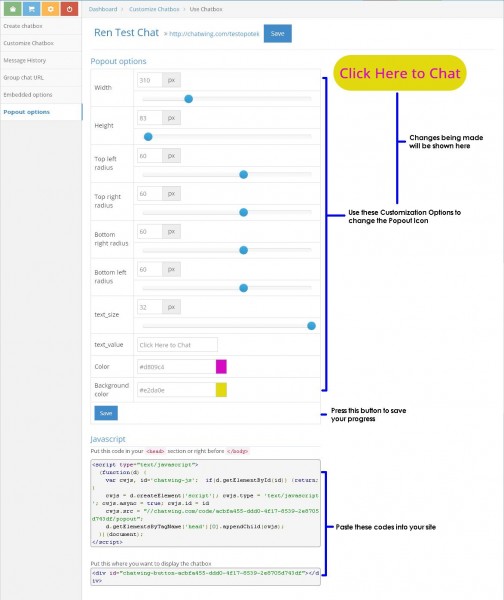
This is also for the site owners, with a twist. Instead of embedding the chatbox, a popout icon will be embedded into your site. This icon will have to be clicked – the chatroom will show up in another window.
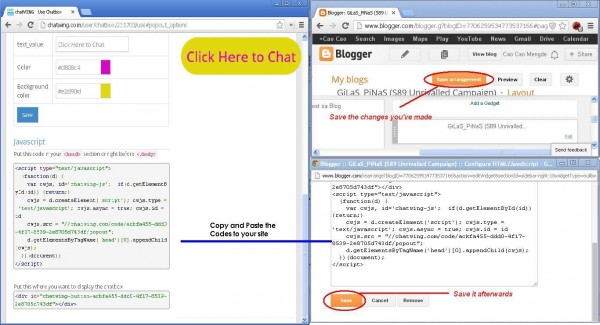
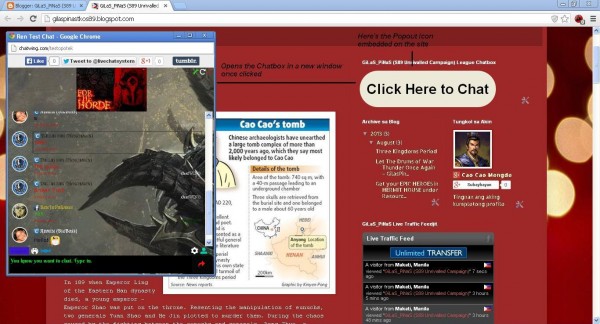
The popout icon can be customized before it can be used. Its HTML codes can be found at the bottom. You’ll need to copy the codes and paste them into your site as well. Once the icon is set up, you can instantly use it.
From these three you can choose one. So pick one which is best suited for you. There are added instructions in the Embedded Options and Popout tab that will help you if ever you choose them.
Using the Chat Software
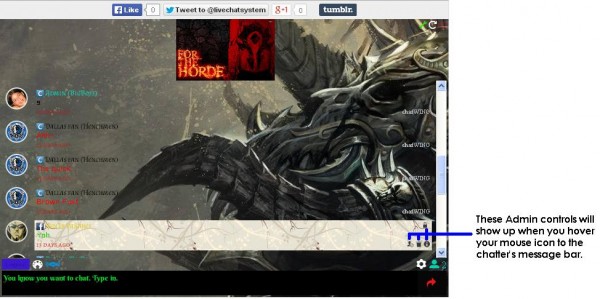
Managing the chatbox is easy. You have the capability to ban others out of the chatroom if you want, as well as other Admin controls. These controls can be given to other people as well, so long as they have chatWING accounts too – you can add them as moderators.
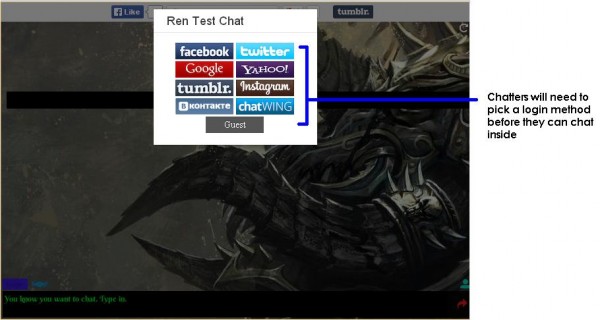
Chatbox users (i.e. your “chatters”) can easily login with their social media accounts. chatWING also allows everyone inside the chatroom to use images and videos when chatting.
chatWING is also available on Android for free. Check it out here.


One Response
Very interesting post about chatbots and WordPress chats. I suggest also https://board.support. It’s new and with some innovative features, it’s promising.